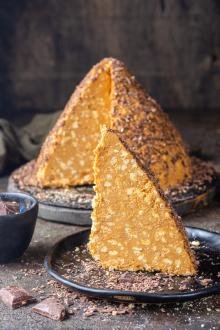
This Russian honey cake recipe, aka medovik, is a gravity-defying layered cake with notes of honey & dulce de leche. It is decadent, beautiful & absolutely delicious.
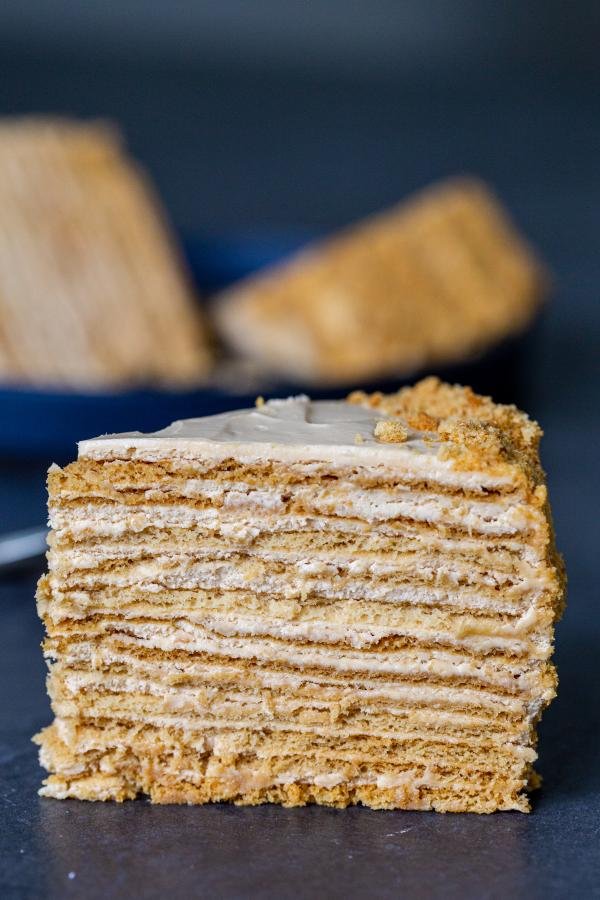
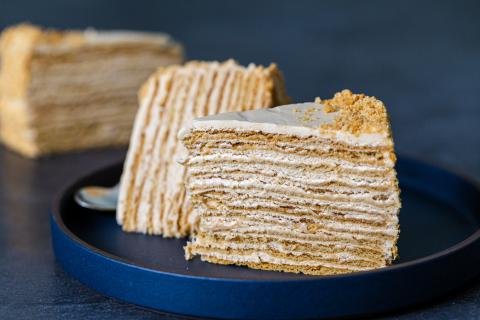
Honey cake is made up of crispy and thin cake layers that are separated by a thick cream cheese and dulce de leche frosting. The end result is an eye-catching dessert that is sure to impress. Whip it up for your next get-together and watch your guests’ eyes widen as you slice in!
Are you obsessed with honey cake? Try your hand at making another Momsdish favorite – Jam Layered Honey Cake.
What is Russian Honey Cake (Medovik)?
Medovik hails straight from Russia and translates directly into “honey”. It is a popular dessert throughout all Slavic countries and it’s reserved for special occasions. Here you’ll find an overview of the flavor, texture, and time it takes to whip up our version.
- Flavor: The flavor of this cake is sweet overload! It doesn’t hold back at all and features strong notes of honey and dulce de leche.
- Texture: The crispy, thin cake layers are soaked in the cake cream overnight, making each slice ridiculously moist.
- Time: Reserve a little patience for this cake, as it takes about 3 hours to make. Trust us, it’s well worth the wait!


Making Honey Cake Recipe from Scratch
The most tedious part about making medovik is baking each individual layer separately. After that, all you need to do is some simple assembly!
Make the Cake Layers
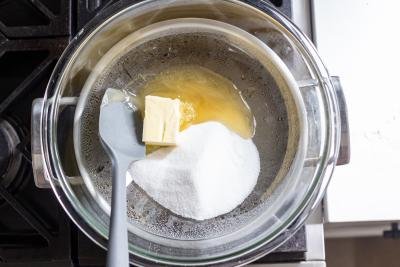
- Create a Steam Bath: First, bring a pot of water to boil and place a heat-safe bowl on top.
- Make the Cake Batter: Next, pour the butter, honey and sugar inside the bowl over the steam bath and allow them to melt. In a separate bowl, beat the eggs and baking soda until smooth. Slowly add in the egg mixture, stirring until well-combined.
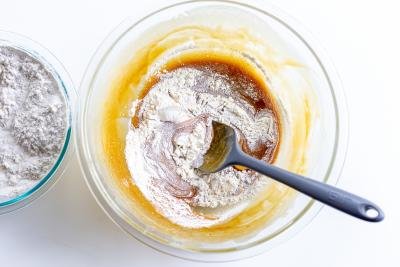
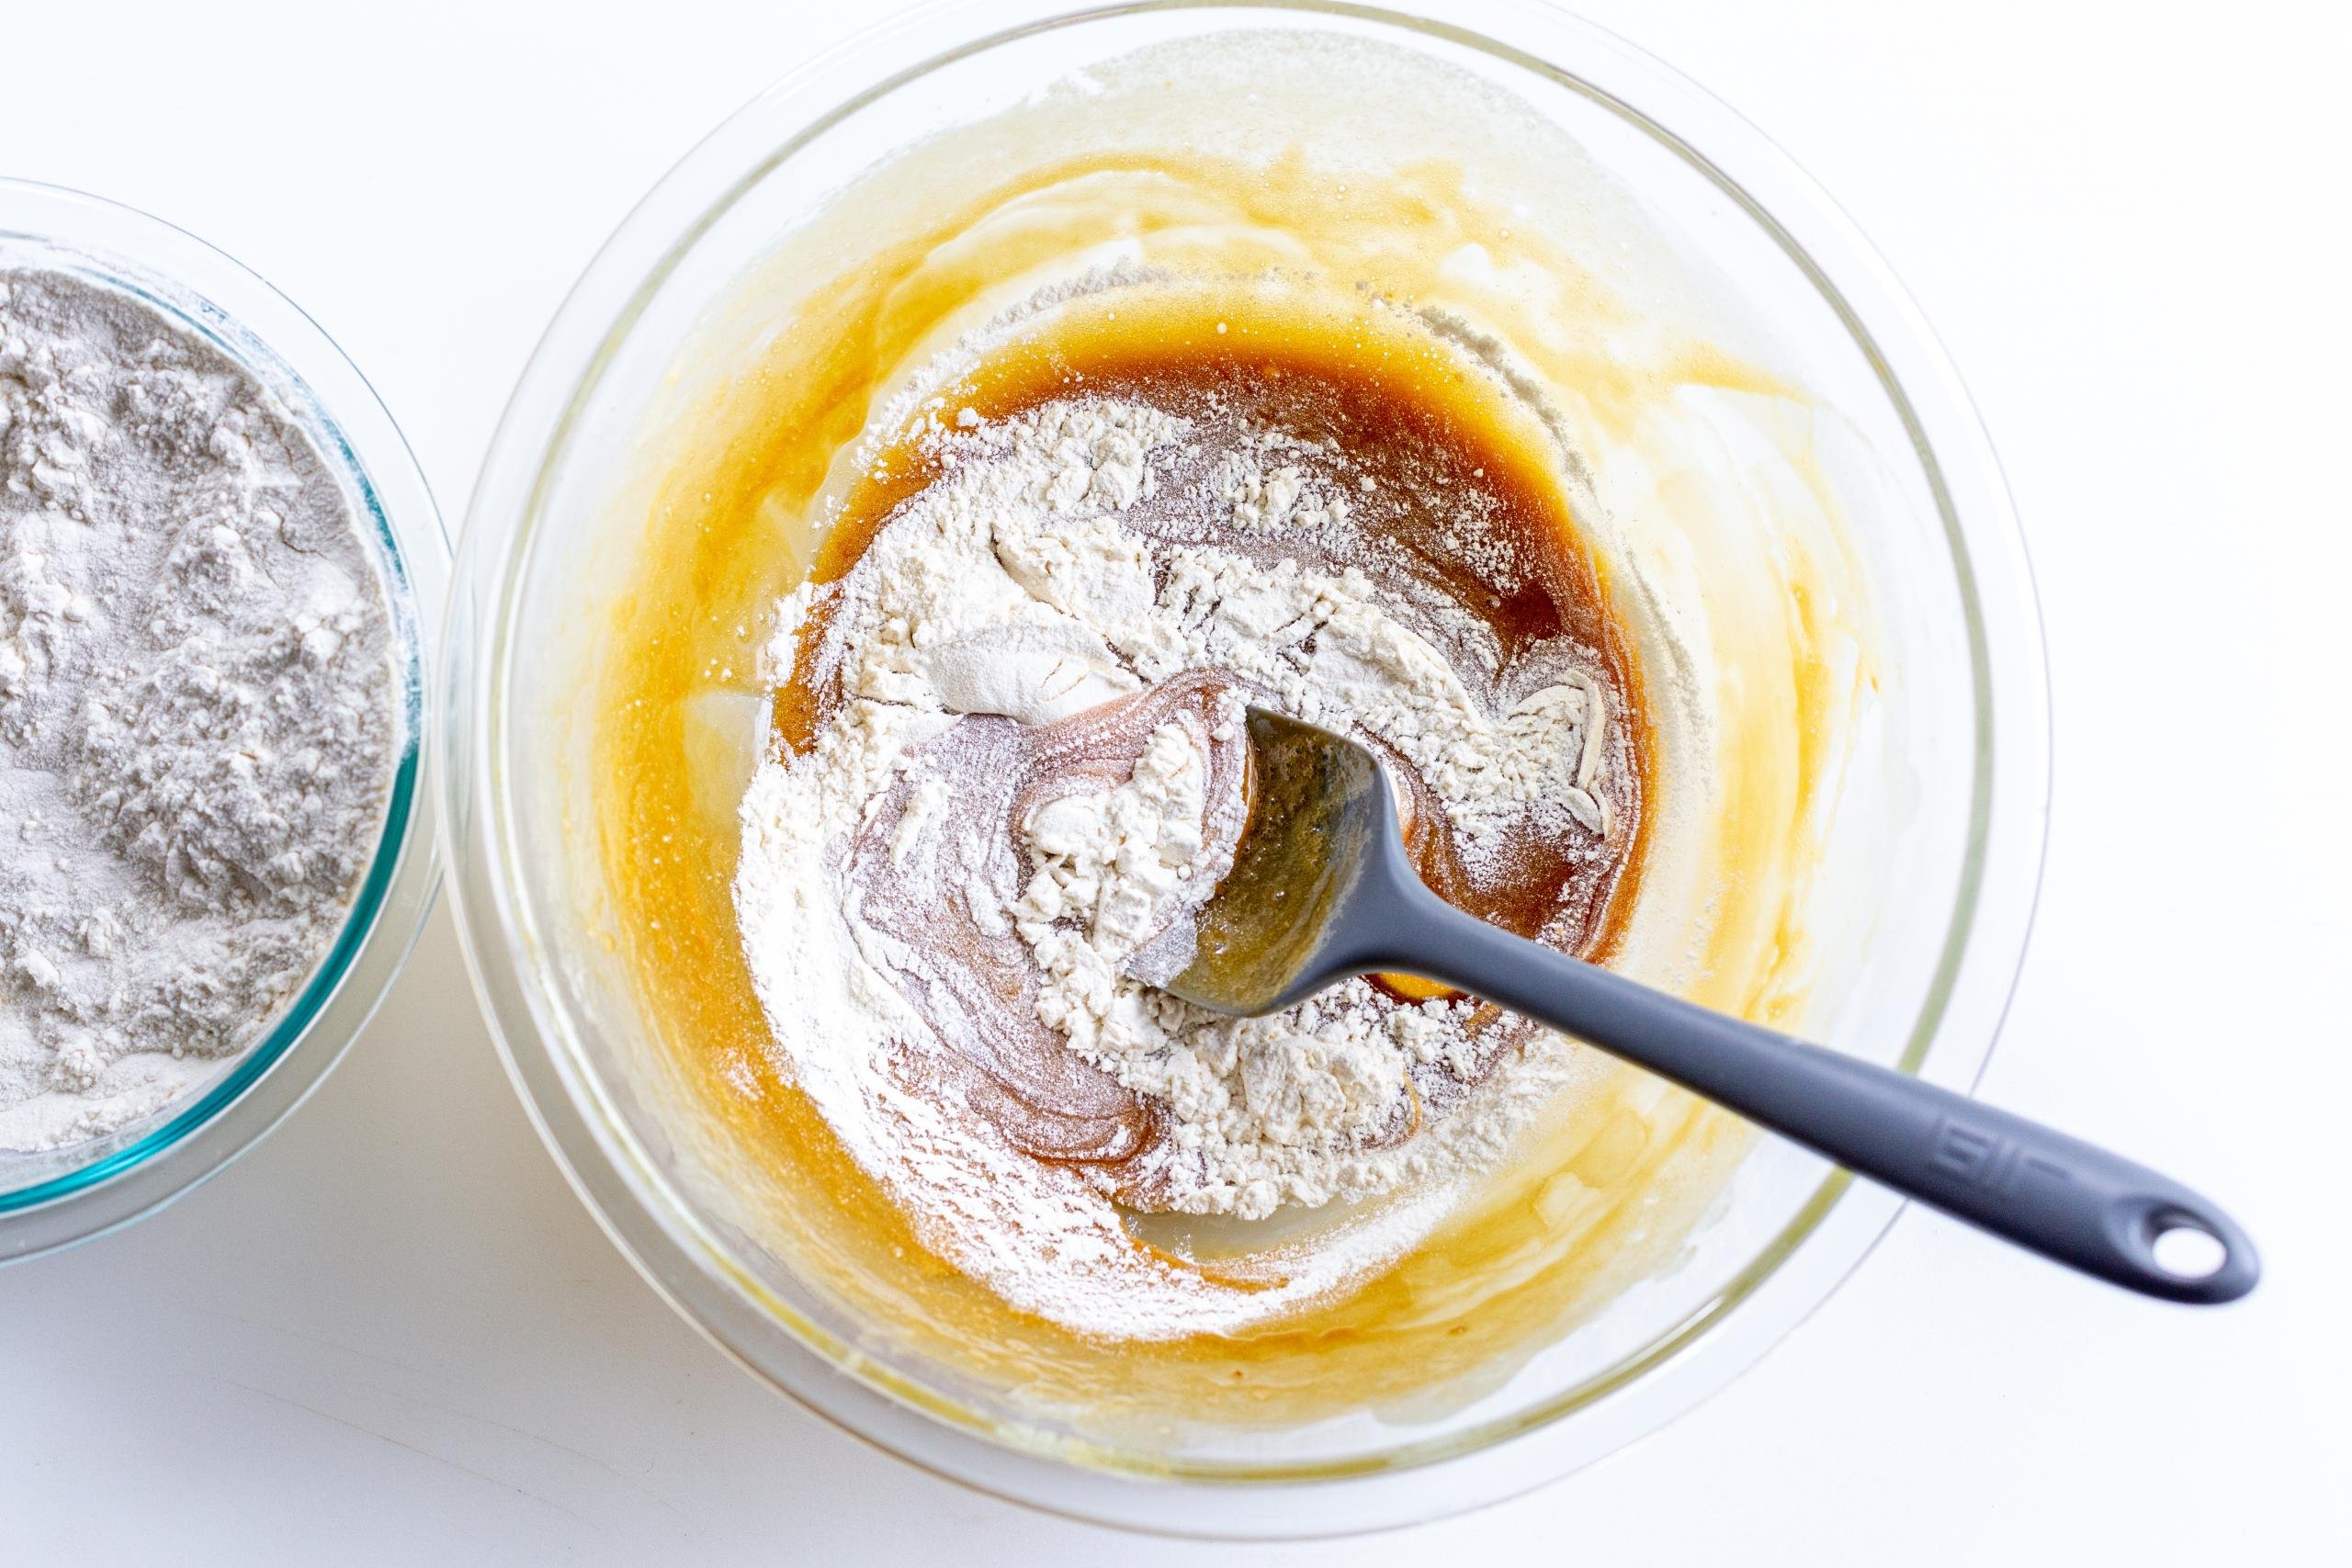
- Cook the Batter: Allow the batter to cook for around 30 minutes over the steam bath. Remove it from heat and add in the teaspoon vanilla extract and all-purpose flour.
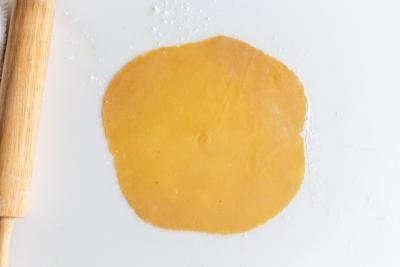
- Shape the Cake Layers: Next, preheat the oven and line a baking sheet with parchment paper. On a floured work surface, divide the dough into 12-14 even pieces and roll out one of them into a thin, flat disc.
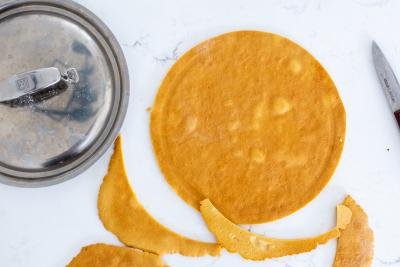
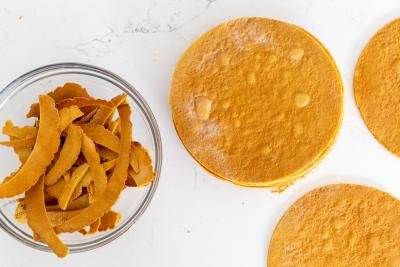
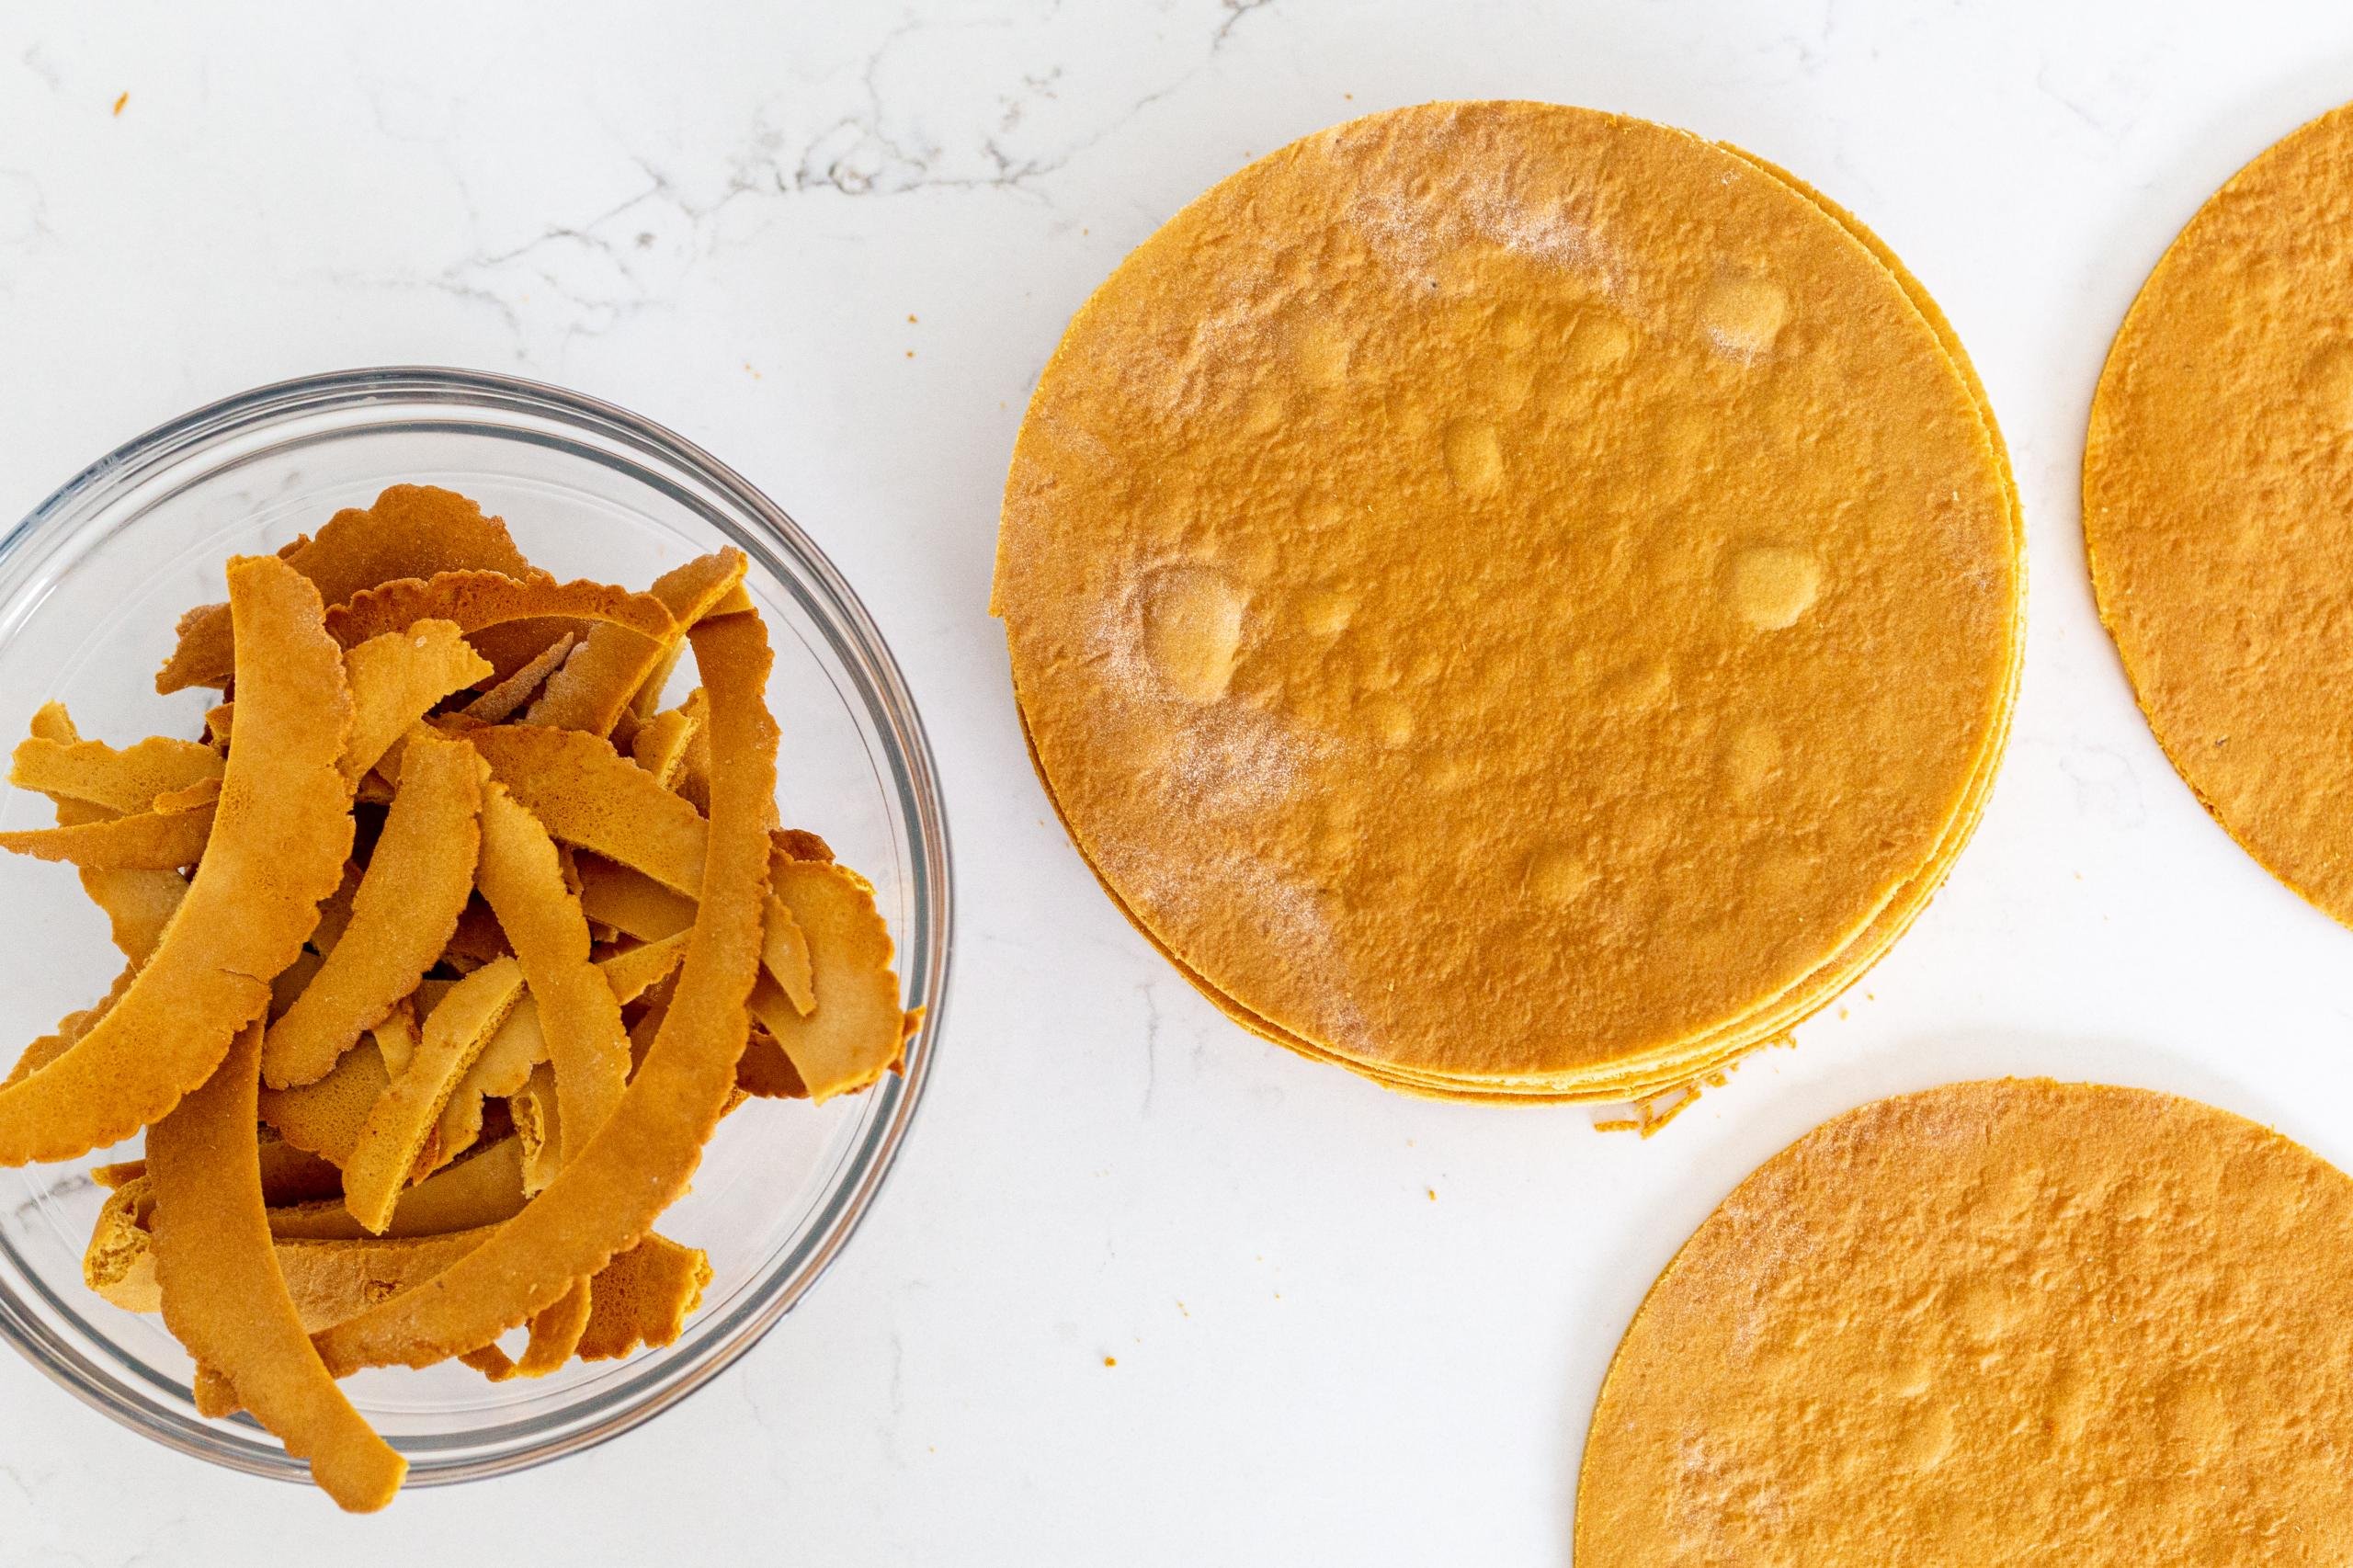
- Bake & Trim the Cake Layers: Bake a single cake layer for 5-7 minutes, or until golden brown. Using a plate, cut out a perfect circle from the cake layer. Repeat the process until all you layers are baked, trimmed, and cooled to room temperature (note: save the cake trimmings for decorating!).
Make the Cake Cream & Assemble the Cake
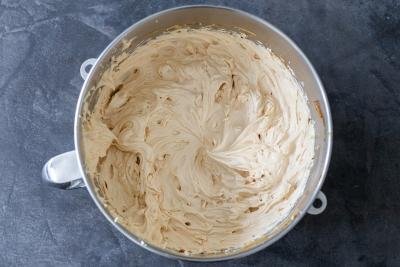
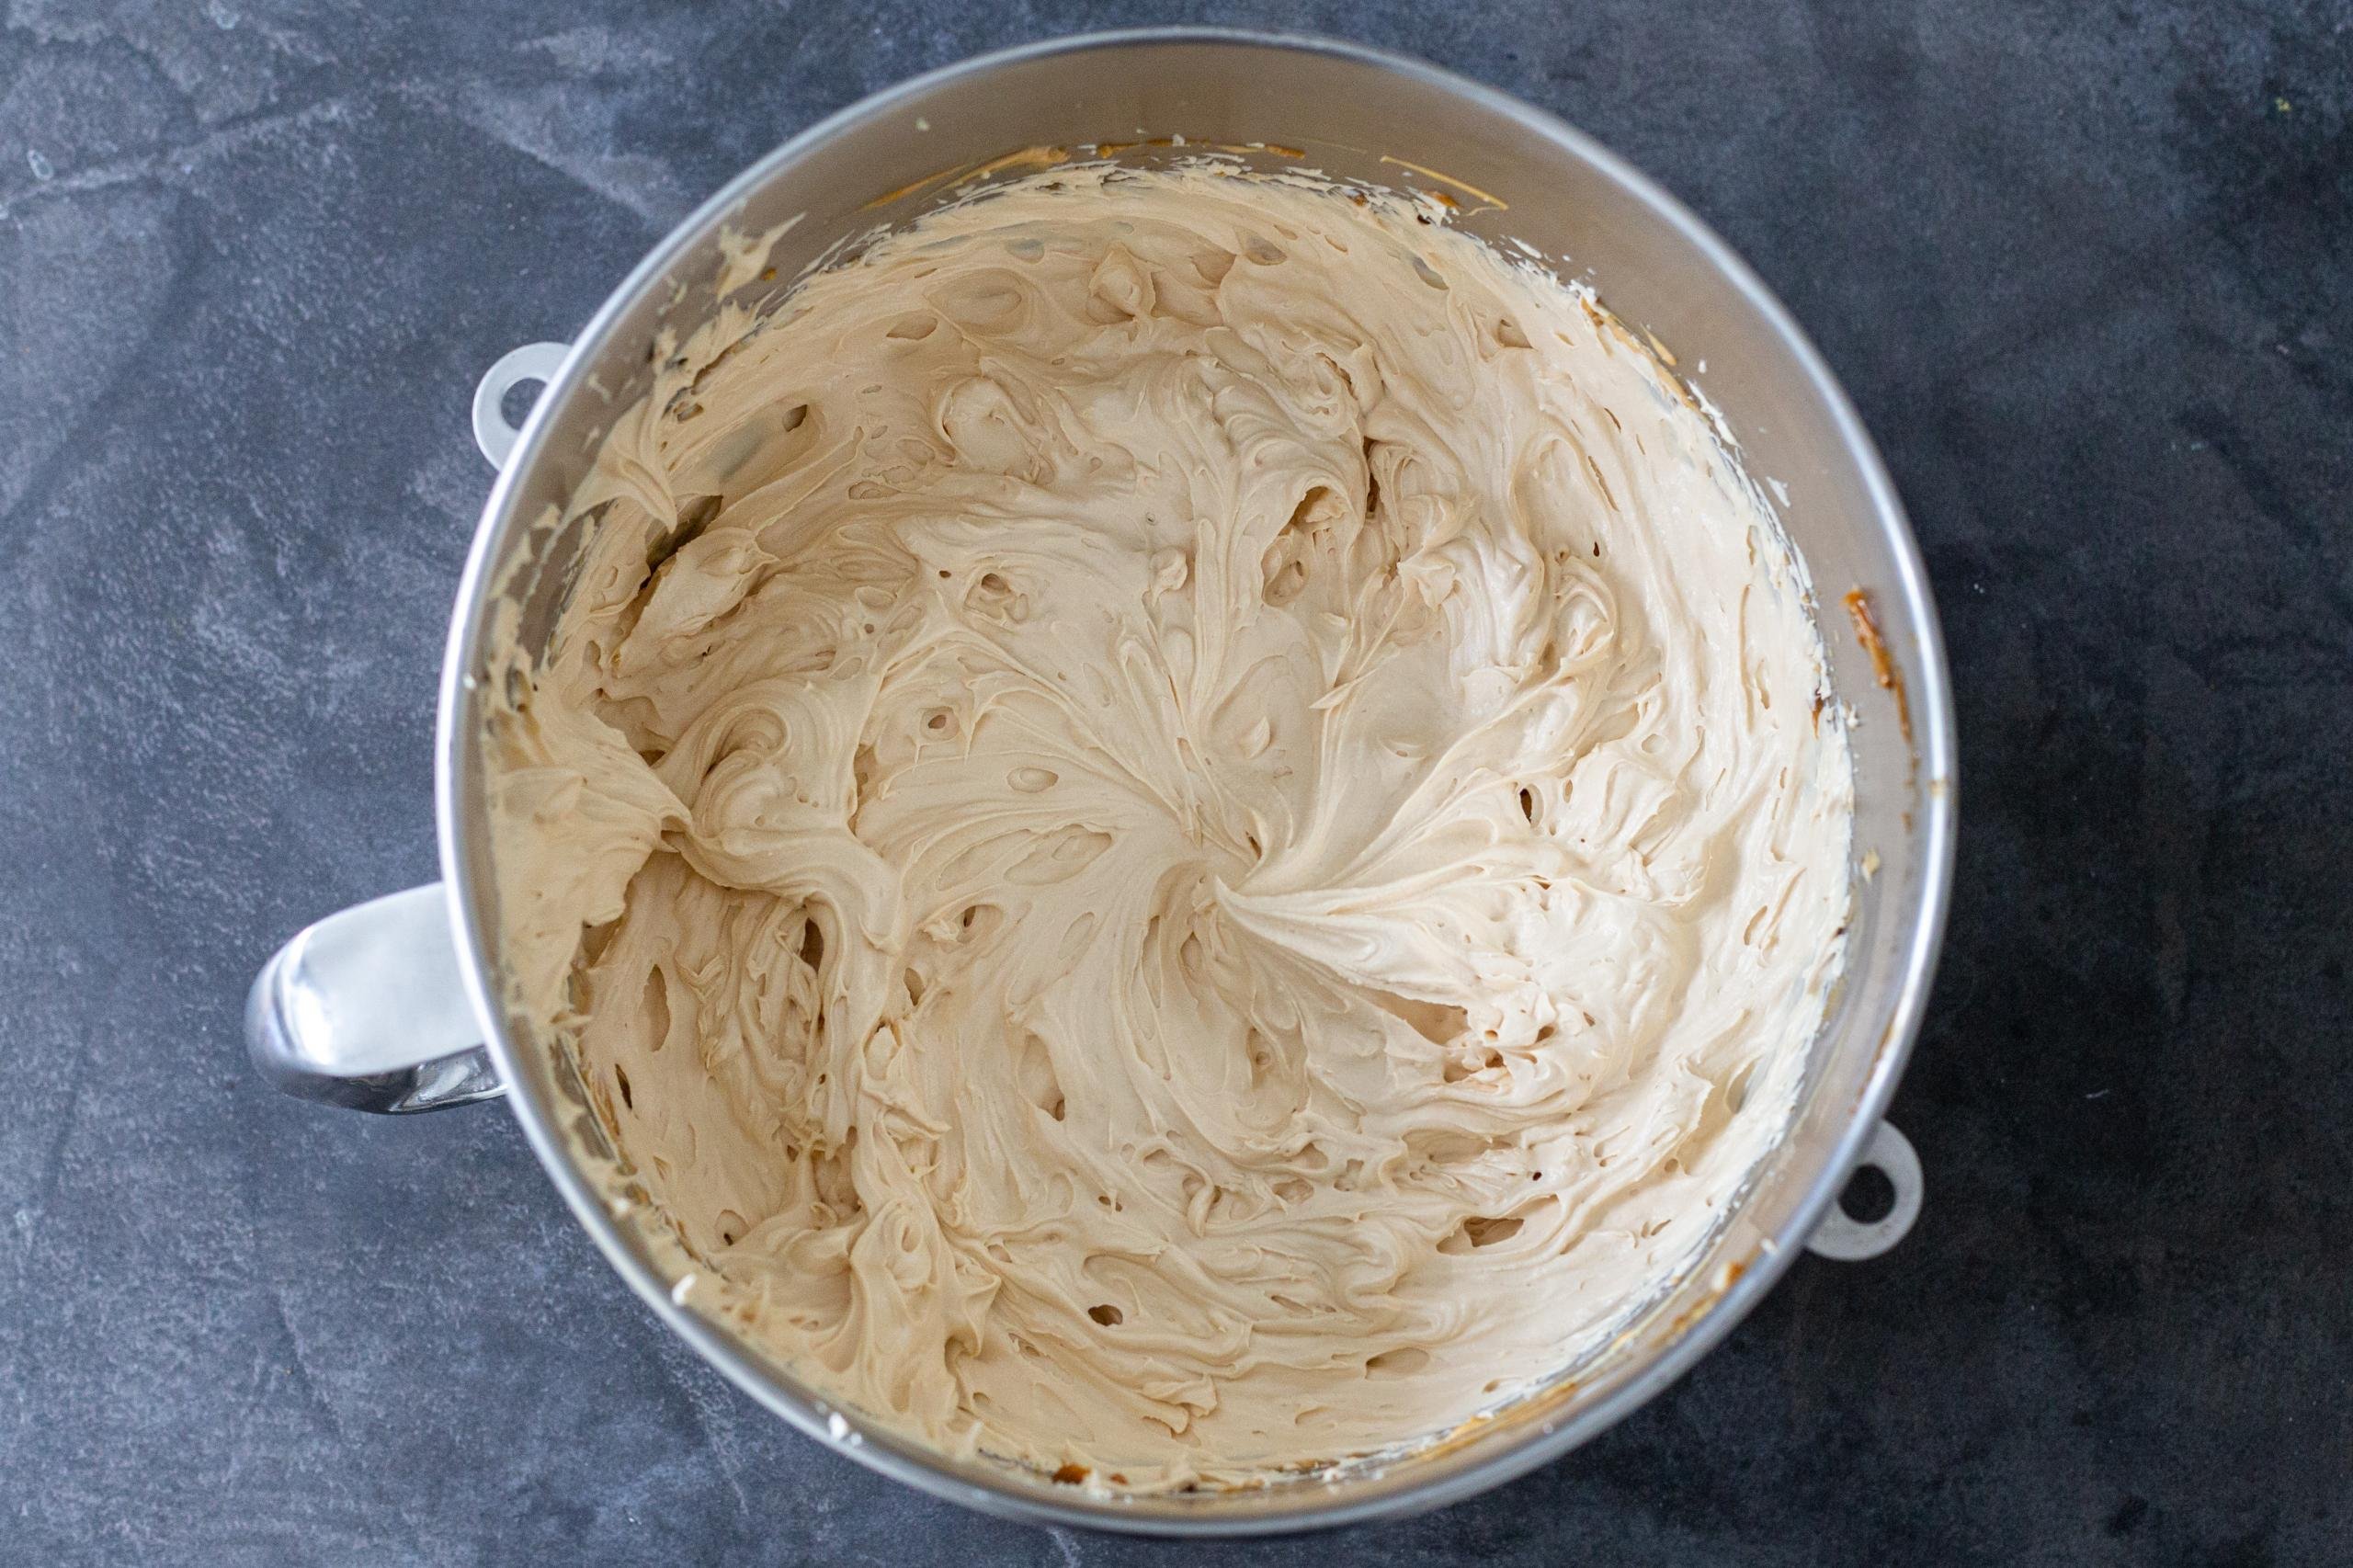
- Make the Cake Cream: In the bowl of a stand mixer or with a large mixing bowl and a hand mixer, beat the butter, cream cheese, and dulce de leche together. Add in the heavy whipping cream and whip until you get stiff peaks.
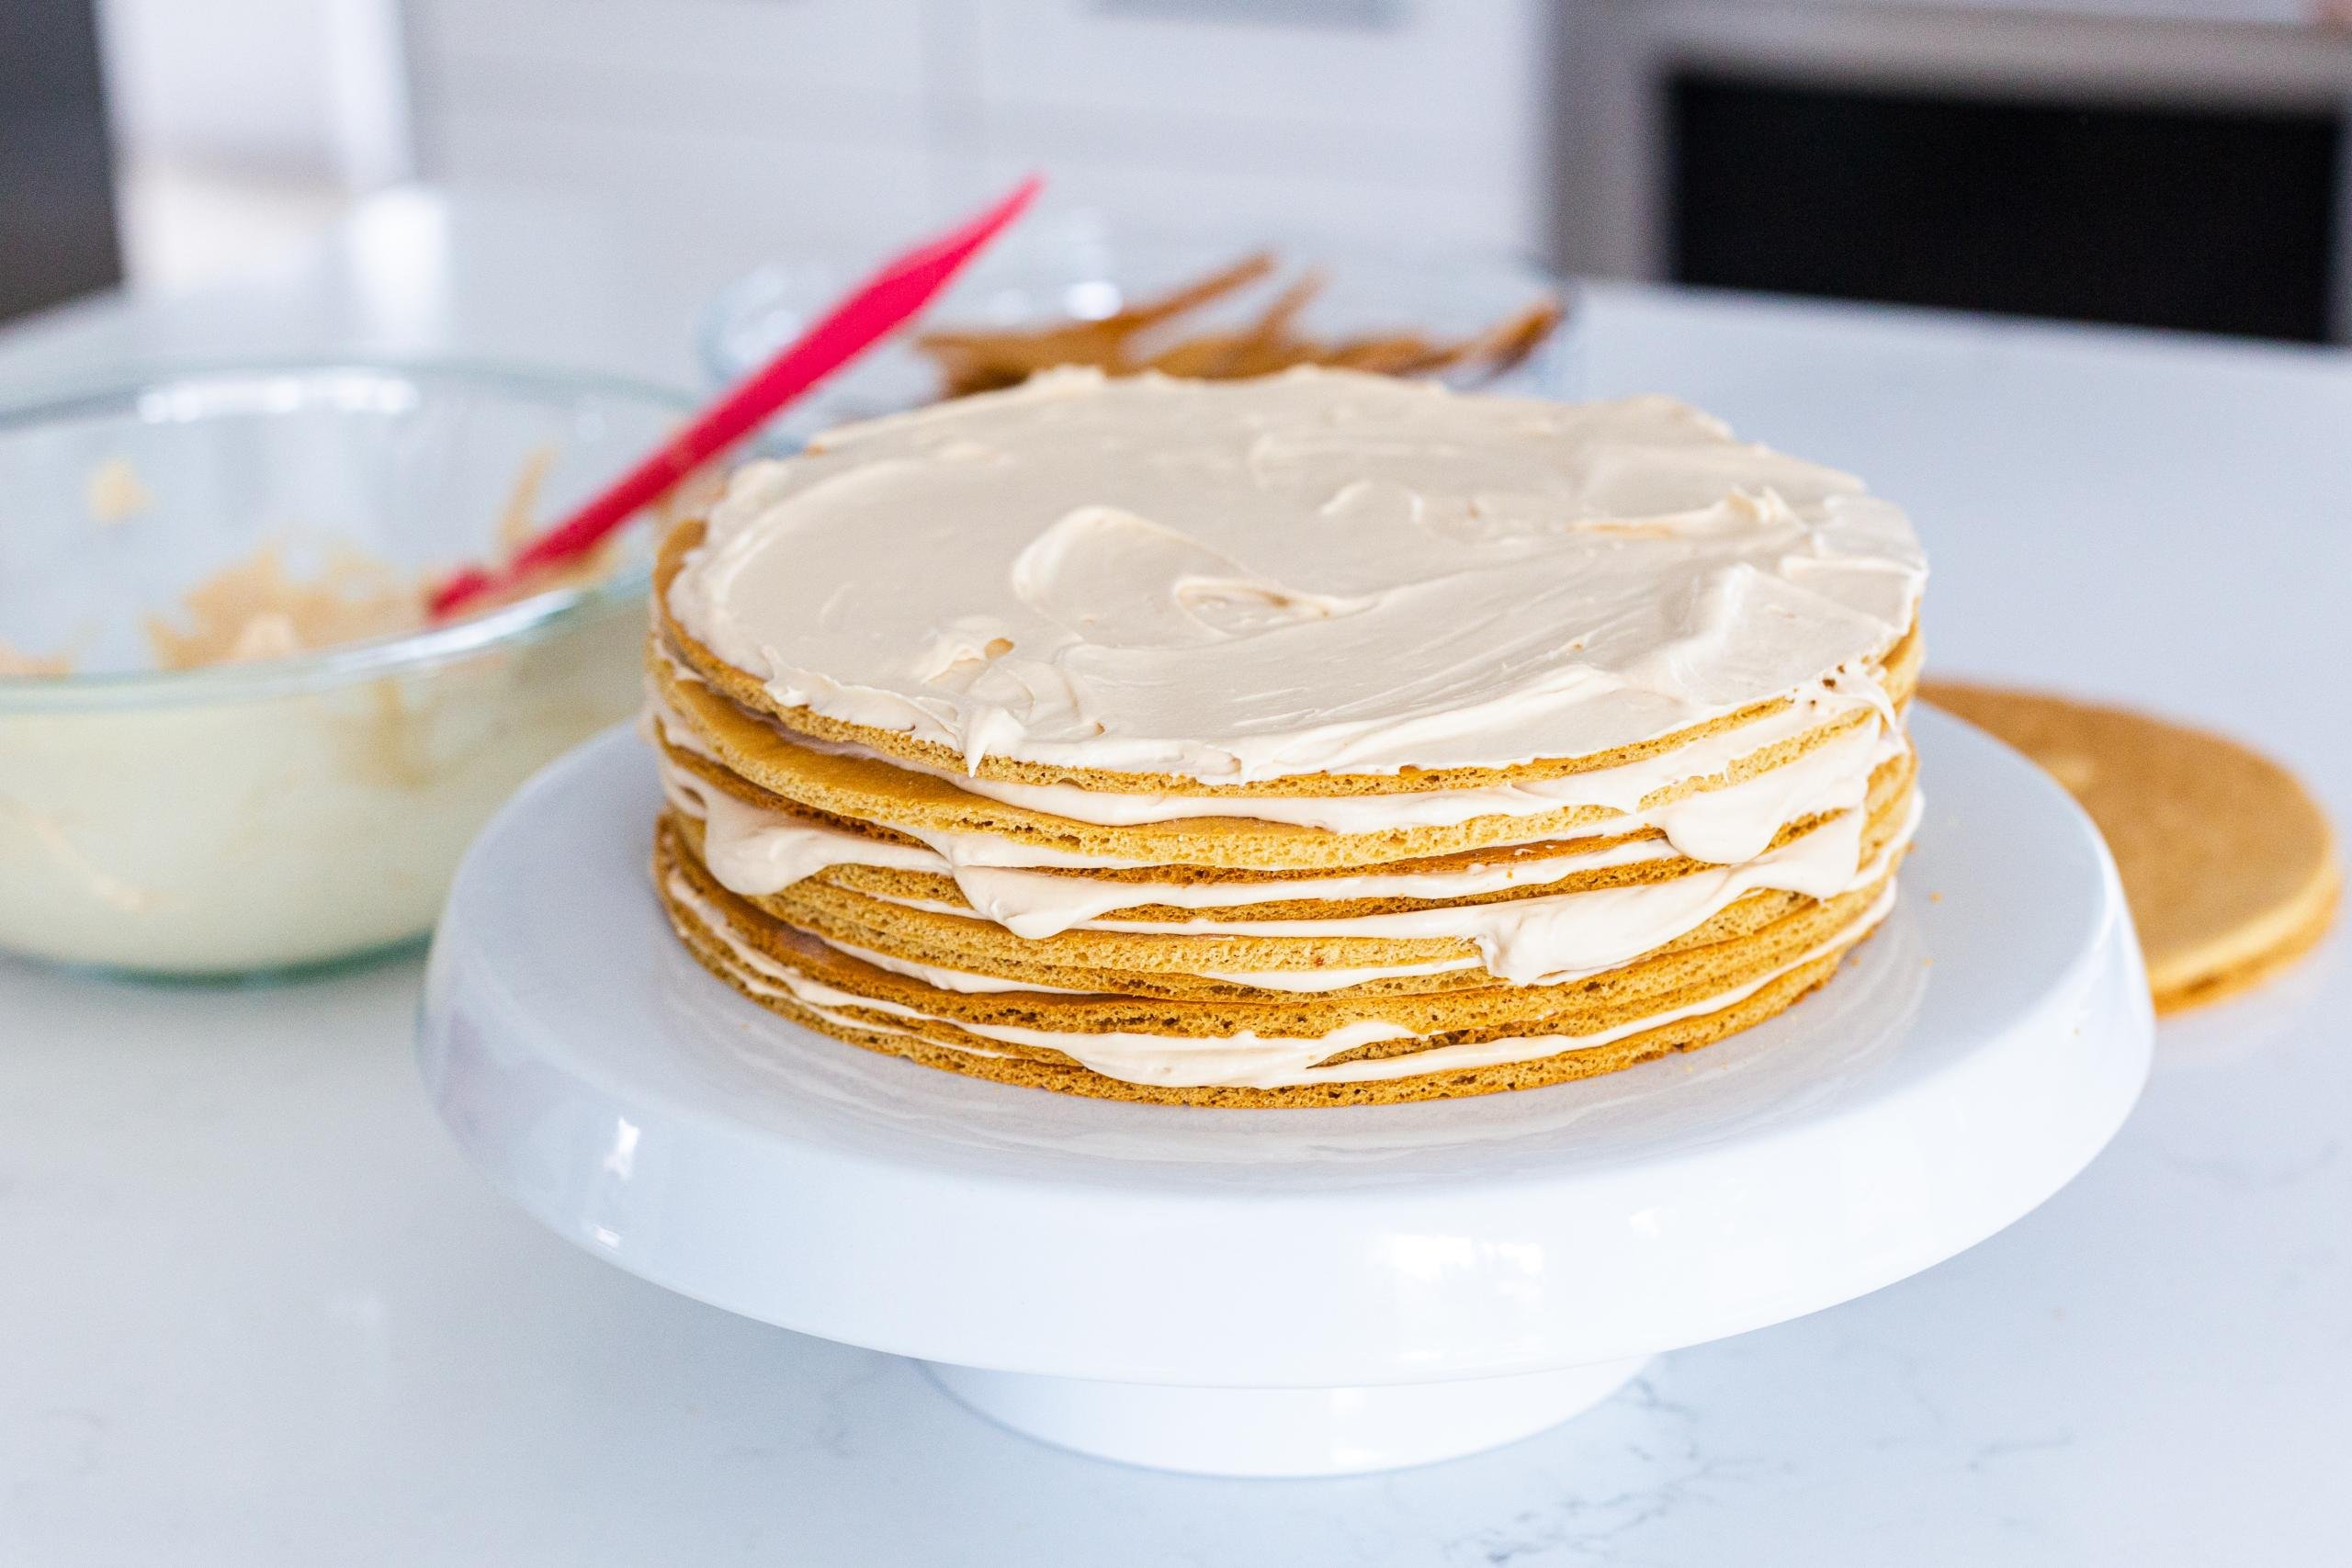
- Assemble the Cake: Next, frost a cake layer with the cake cream and stack a layer on top. Repeat until the cake is fully assembled. Frost the outside of the cake with the remaining cake cream.
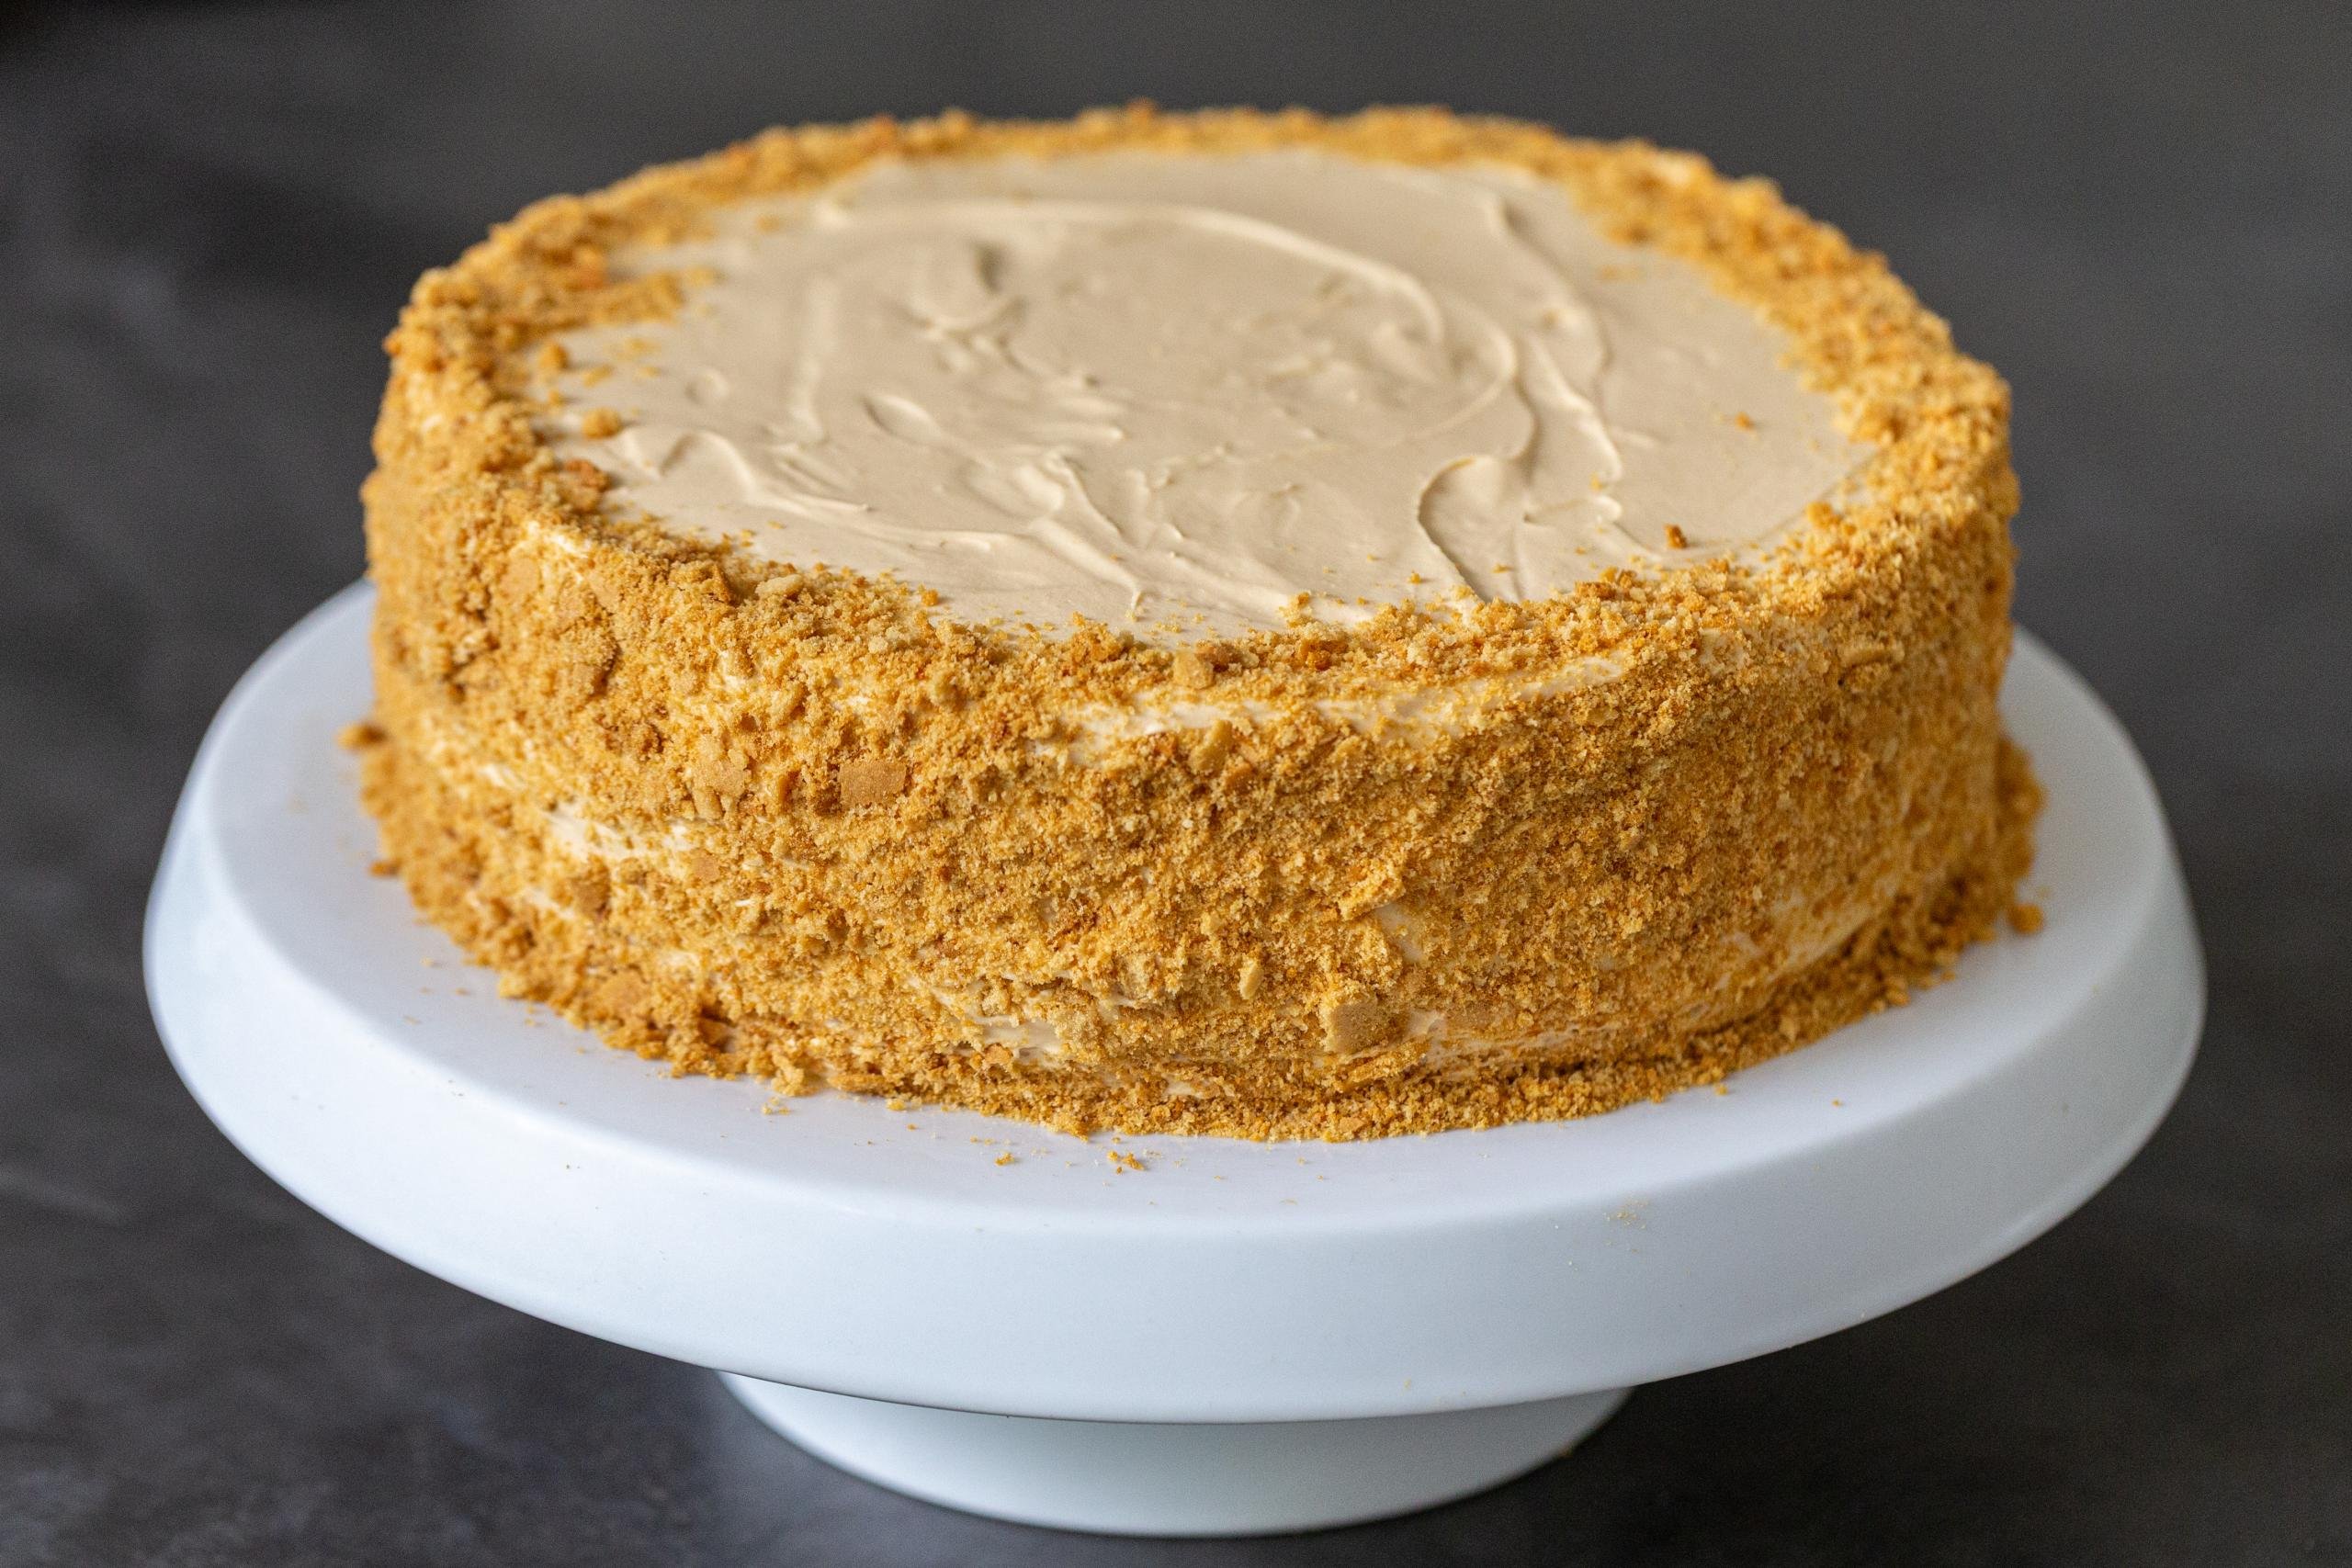
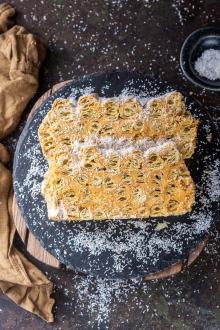
- Decorate the Cake: Blend the leftover cake pieces and use the crumbs to decorate the sides of the cake:
- Refrigerate the Cake: Allow the cake to set in the fridge overnight to develop its flavors. Before serving, let it sit at room temperature for a couple of hours. Bon appetit!
Hot Tip: This honey cake calls for dulce de leche. If you’re feeling up to it, make our Instant Pot dulce de leche.


5 Tips for Making the Best Honey Cake
A couple of handy tips will help you make the best honey cake recipe possible.
- Make the layers in advance. This cake is awesome because you can make the layers up to a week in advance. Just make sure to cover them tightly with plastic wrap and store them in a plastic bag until you are ready to assemble.
- Use room temperature butter and cream cheese and extra cold heavy whipping cream. Bring your butter and cream cheese to room temperature and keep your heavy cream very cold. This makes the whipping process much easier, while also creating an awesome texture.
- Don’t over mix the cake cream. Once you add the heavy cream to your cream cheese and butter, pay extra mind to not over mix your frosting. Over mixing the heavy cream can cause it to curdle and turn into butter. Once you see stiff peaks begin to form, immediately stop mixing the frosting.
- Give the cake time to set. After you assemble your cake, allow it to set it in the fridge for at least 12 hours. This will not only help with the cake’s overall stability, but it will also make it much more moist and flavorful.
- Tailor the cake cream to your taste buds. If you want to skip out on the cream cheese or butter, feel free. If you remove the butter, compensate by adding more cream cheese and vice versa.
Storing & Freezing this Honey Cake Recipe
Whether you’re prepping your cake ahead of time or need to store some leftover slices, find all you need to know here.
- Refrigerate: Keep your cake in a sealed cake container for up to a week. This cake tends to absorb the smells of the fridge, so you want to make sure it’s stored airtight!
- Freezing: You can make this cake in advance and freeze it for up to a month. Fresh cake is always supreme, but this definitely is a viable option. Pull out the cake from the freezer and allow it to thaw overnight.
FAQ
Can you make honey cake with just sugar?
It’s best to use honey for traditional honey cake instead of just pure sugar. The deep, earthy honey flavor is the signature ingredients for the cake and really make it what it is.
Is cooked condensed milk the same thing as dulce de leche?
Yes, cooked sweetened condense milk is the same exact thing as dulce de leche. You can easily make it yourself or just buy a premade can of dulce de leche.
What kind of flour should you use to make honey cake?
Regular, old-fashioned all-purpose flour is all you need to make a traditional medovik cake. You want to stay away from cake flours, as they are much too fine to yield the crispy cake layers.
How far in advance can you prepare the cake layers for honey cake?
You can prepare the cake layers for medovik cake up to 5 days in advance and store them in the refrigerator. If you want them to last even longer, freeze them for up to a month.
A Few More Russian Cakes to Try
- Dulce De Leche Cake (Golden Key Cake) – Luscious caramel cake
- 5 Ingredient “Sharlotka” Apple Cake – Rustic apple cake
- Chocolate Layer Cake (Spartak Cake) – Thin, chocolate cake layers separated by a thick cream
- Chocolate-Honey Layer Cake Recipe – Irish creme liqueur chocolate honey cake
Recipe
Ingredients
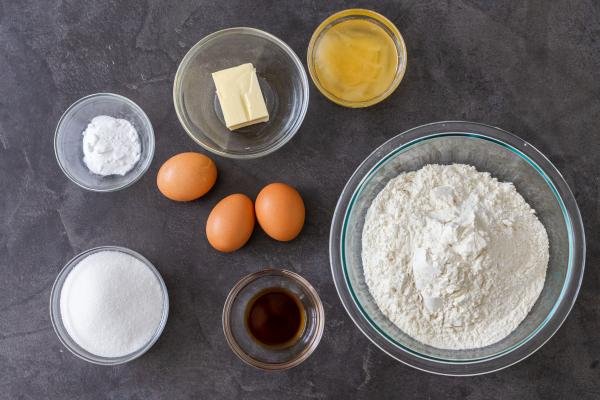
Cake Layers
- 70 g Unsalted Butter
- 2 tbsp honey
- 1 cup sugar
- 3 eggs
- 1 1/2 tsp baking soda
- 1 tsp vanilla extract
- 3 cups flour
Cake Cream
- 200 g Unsalted Butter
- 8 oz cream cheese room temperature
- 16 oz heavy whipping cream
- 12 oz dulce de leche
Instructions
Cake Layers
- Bring a pot of water to boil and place a heat-safe bowl on top (this is called a "steam bath"). Place the butter, honey, and sugar inside the bowl and allow the mixture to melt.
- In a separate bowl, beat the eggs with baking soda until smooth in consistency. Slowly, add the egg mixture into the honey mixture in the steam bath, continuing to stir as you combine.

- Cook the batter for about 30-40 minutes until the color deepens. Take the batter off the steam bath and add in the vanilla extract. Let the batter sit for 10 minutes. Add in the flour (the batter will be sticky and that's OK). Preheat the oven to 350°F and line a baking sheet with parchment paper.
- Flour a work surface generously to help you work with the sticky dough. Divide the dough into 12-14 equal-sized pieces (you can use a scale to make this super exact). Roll out each dough piece into a large round circle (you'll want it big enough so you can shape it into a perfect circle later). Roll the circle back onto the rolling pin and unroll it onto the lined baking sheet.
- Bake each cake layer for 5-7 minutes, or until golden brown. While one cake is baking, roll out another layer to speed up the process. Once the cake layer comes out of the oven, use a plate as a stencil to cut out a perfect circle. Repeat the process until all your cake layers are baked and cut out with a stencil. Save the cake trimmings for decorating.
- Allow all the cake layers to cool at room temperature in a single layer – do not stack them while they're hot!


Making the Cake Cream & Assembling the Cake
- Whip the butter with the cream cheese and dulce de leche until smooth in consistency. Add in the heavy whipping cream and whip until you get stiff peaks (note: don't over mix, or the heavy whipping cream will turn into butter).
- Frost a cake layer and stack another on top. Repeat the process until all the layers are stacked. Frost the outside of the cake with the remaining cake cream.

- Shred the leftover cake pieces in a blender and use it to decorate the sides of the cake. Allow the cake to set in the fridge overnight. Before serving, allow the cake to sit at room temperature to develop the moisture. Slice and enjoy!


On average how long do you mix the frosting in a stand mixer until peaks form?
Hi Heidi, depending on the speed, it only takes a few minutes. I always watch it closely because if it overbeats, it can become lumpy like butter. Hope this helps!
Hello Natalya,
Thank you for your dedication for writing down this recipe.
I tried making the cake layers earlier and it didnt work out well for me, the mixture cooked in a steam bath ended up like a thick custard texture after 20 mins of cooking.
Does the inner bowl touches the boiling water? And do you use low, medium or high heat during the steam bath?
Thank you,
Sharon.
Hi, Sharon! I'm encouraged that you're trying out one of my favorite cakes! To answer your questions, for the steam bath, the inner bowl should not be touching the hot water underneath. I usually keep the heat somewhere between medium and high so that the steam bath continues to simmer the entire time the mixture is melting in the inner bowl. I'm sorry your mixture seemed to cook a little too much. For future reference, while the mixture is melting and the egg mixture is being added to it, I continue to whisk. I do this until I see the mixture change to a deeper darker color and thicken slightly. I hope this helps!
Made this about half a year ago and was a big hit and a deal was struck which means I’ll be making it again this weekend.
Had to add a bit more flour to get it workable even with a generously floured surface-might’ve been too warm at the time, otherwise all good.
My only gripe with the recipe is the bizarre combination of measurement types. Some in metric weights(grams), others in imperial(ounces) and the ever infuriatingly imprecise measurement of cups which meant I had to convert the ingredient list first. Would’ve given five stars if not for this.
Hi Jay, I can see that happening when the dough is very warm. Sometimes it gets too hard when it’s cold, lol… the window moves quick! As far as the measurements go, we only have one tool available right now where certain things come in volume and some in weight. The tool converts it for us. I hope this helps you understand the situation.
I am kinda jelly that you get to enjoy the cake 🙂
Epic cake absolutely loved it. Making dough was a challenge for me and ended up being square. Was super sticky so added flour and was good but I think it diluted the honey flavour a bit. Not sure if it’s right but out it in the fridge and was way better to roll out between two pieces of baking paper.
Hi Sophie, as it cools down it does harden a bit but you do have to flour working surface. If you leave it in a fridge for too long it can be hard to work with. I am glad that you were able to figure it out and still loved it at the end.
This wasn’t the best recipe. The dough was okay, although it was a bit difficult to work with. The dough very easily cracks and rips - and doesn’t get fixed. The frosting was horrible. Within the first five minutes of mixing at a low speed, the frosting became chunky and started to separate - so we put it in a bowl and let it dissolve through a water bath. It was okay, until we started mixing and once again it became chunky. We kept mixing and it started to work, but that too barely. When we put it on the layers it was very drippy and chunky and the final product didn’t look very nice. The process took much longer than expected and was much more complicated than was stated in the recipe. Overall, it tastes okay, but visually it’s very disappointing.
I’m sorry to hear the recipe didn’t turn out as expected. I really appreciate you giving the recipe a try! It sounds like the emulsion may have broken when making the frosting, which can happen due to temperature differences between ingredients or overmixing. I'm glad it tasted okay though!
Couldnt you also make a whole cake freeze slightly when cool then slice it freeze the slices in parchment (so they do not break)then put them in the mold? My mom always froze cakes before icing them as it was a lot easier...so it crossed my mind reading the notes
I haven't tried that, but sounds like an interesting method.
Used an 8” lid to cut out the discs. Would recommend 10”, but I had a hard enough time getting thin enough for 8” diameter. Would appreciate recommendation for how much filling to add to each layer, as I ran out towards the end, and didn’t have enough to cover the cake.
Hi Lacy, Thanks for your feedback. I would suggest to weigh the cream and divide according. Its hard to recommend how much cream because everyone makes them slightly different size so they have more or less layers. Hope you love the cake!
My grandma used to make a cake called “Madonna” with a cream made of equal parts butter and condensed milk. I was wondering if I could make this cream for this cake? Thanks!
Hey, You could try it! Let me know how it works out! Happy baking 🙂
What a great recipe, bit messy when it comes to rolling out the dough but well worth it - use twice as much flour on the bench as you would expect! This has been a favourite cake flavour of mine forever so I am so pleased to have found a completely doable recipe that doesn't have a thousand ingredients. This will be my go-to specialty from here on out. THANK YOU!
Hey Misty, Thanks for the feedback, and I'm thrilled you love this cake as much as I do! 🙂
Thank you for the recipe Natalya , so kind of you to share.
I would like to know for how long you keep the sugar, butter and honey mixture on the steam bath? Do you have to wait for all the sugar crystals to melt before adding the egg mixture?
Thank you.
Hey Sharon, I do wait for the sugar to fully melt. Sometimes bowl can slowdown or speed up the process. I would say until you dont see crystals. Hope this helps 🙂
Natasha, thank you so much for this recipe! It is truly the best recipe I have tried and the cake turned out delicious every time. I plan to make this cake for Thanksgiving as well as Christmas.
You are so welcome! This cake is perfect for the holidays - I hope everyone enjoys it!
I’ve made this cake 20x now and everyone who ate it LOVES it! Thank you so much for sharing 🩷.
I’ve tried other recipes and yours are the best!
I'm flattered you think ours is the best! 🙂
Complete disaster
The dough is sooo sticky could only manage to make shape the size of a small plate
Dividing the dough give a ridiculous amount of dough to work with
Don’t recommend this very long exhausting recipe
When dough is made and slightly gooey. Stick it in fridge for 30 min ,then take it out and add the rest of flour. Because what happens when you add flour to warm dough it mixes and takes more flour then needed. This way, once it's out of fridge, go back to adding rest of flour and mix it well then it won't be so sticky BUT honey cake is sticker then other cake dough. I usually add more than half into dough and them rest after fridged
Hi Cece, I'm sorry this cake turned out a fail. One of the reasons it can be sticky is when the dough is very hot or not using enough flour on a working surface. Did you flour the surface?
The most tedious part of this recipe is scrolling up and down the page past ads to find the directions you need
Hi Erica, At the top of the blog post is a "jump to recipe" option. Click on that and it will take you straight to the recipe! Enjoy!
Tried making this twice in one day. The first time I added too much flour (my fault) started over and second time followed exactly and everything was fine until it was time to roll it out. It would not roll out. It was sticking to everything. I tried adding it bit more flour, didn’t work…. Tried warming it in microwave…. Duddnt work….. I could only get two layers from five hours of trying to make it 😣 so disappointed ☹️
I recommend rolling the dough out on parchment paper that way you don’t have to lift anything off the table , I had the same issue come up. Ones I figured out the parchment paper trick it was way easier
Hi Tapang, The rolling part does take some practice since the layers are so thin. I recommend dividing the dough into 12-14 equal-sized pieces first, then rolling out each piece on a floured surface. I hope this helps!
what about a recipe with the dough being more of a batter? then you could make crepes or pancakes seems much easier
That's possible too, but I've always rolled out the layers, so this is how I do it.
How thick should the layers be?
Hey Cherie, I roll them out as thin as possible to the point of being almost see-through. I prefer super thin layers, but they can be slightly thicker too.
I have tried this and it turned out really good and not too sweet. I dont have dulce de leche but I used different caramel spread.
Hi Jacqueline, I'm happy to hear it turned out tasty using a different caramel spread. Thanks for sharing!
hi there natalya,
I'm making this cake for the 2nd time, what proportion of sweetened condensed milk can i use for this recipe???
Hi Remmus, I use dulce de leche in this cake. I haven't tried using sweetened condensed milk but I do have a dulce de leche instant pot recipe you could make from the condensed milk though! I hope this helps.
I cook the can of condensed milk in the slow cooker on low for 8 hrs to make dulce de leche. Let can cool before opening
Thanks for sharing Lyn!
Made this cake and it turned out very good !!!! The instructions are very clear . Our friends said that it turned out exactly lake Natasha’s, cause we ate the one she made at a party … so yay for the perfect honey cake recipe!!!!!
Hi Tati, What a small world! So happy to hear this!
Hi. I am planning to make this cake. Is it possible to substitute sugar with pure Stevie? Thanks
Hi there, I have not tried that. I am not sure if it will make a difference or not. I would love to know the result, if you give it a try.
This cake has become our Easter tradition, the best cake ever! One question. When and how do I defrost frozen cake layers? After I baked those layers the event I baked for got postponed so I frozen them. But I’m not sure what is the best way to defrost and when I should take them out of the freezer. Any tips appreciated!
Hi Nica- I would recommend defrosting the layers shortly before frosting them, about an hour or so at room temperature. Since they are thin, I don't think they will take very long to thaw. Hope this helps!
Im so terribly disappointed by this recipe. The cake dough was impossible to mix after 3 cups of flour (I had to kneed it just to incorporate it all) it completely crumbled when I attempted to roll it out. I baked what I could manage to hold together. Then the cream was looking hopeful until I added the cream, after a minute of mixing it began to split almost immediately. The entire thing is garbage, what a waste of money.
Nothing like this! Everything works out great!
Mine turned out perfect!!! Followed the recipe step by step… maybe you overheated or just not the best ingredients…. 🤔
Hi Kat, I am so sorry the cake didn't come out the way you expected. During the steam bath, the liquid does increase in volume so maybe it wasn't cooked long enough? And in that case you had too much flour for the amount of liquid. Also, when working with the dough, it should be very soft when warm but as it gets colder it can be stiff and crumble, you can place it back steam bath or microwave for a few seconds. Cream does separate if you over mix it, this is why we do suggest only reaching stiff peaks. Let me know if this is helpful. I am sorry again, baking can take some practice to nail it.
Hi Dana,
I made this cake two days ago for a Russian friend's birthday.
One word Amazing! There was another Russian guest and both agreed that it reminded them of home!
Note:
In SA we only get normal and caramel (cooked) condensed milk.
The cream did not want to stiffen with the cooked version, but the ordinary condensed milk worked perfectly.... and apparently gave the correct taste. (I also learnt that the recipe differs from region to region) - but I got it right!
Again thank you... this recipe goes into my tested and delicious file!
Will definitely make it again!
Andries
Cape Town, South Africa.
Picture on Instagram "Sweet Petals Cape Town"
Hi there Andries, I am so delighted to hear that the recipe was a success! Sounds like you are a pro! Thank you so much for sharing your process. Enjoy!
Hi Dana, can you tell me please the quantity of sour cream used, 8 oz or more? Thank you
I originally from Russia and made this cake back home decade ago. I made the cake again. Accurate recipe all the way except the cream. I used condensed milk, which I bought in Russian food store and cooked it for 3 hours in the can. Then I mixed with butter, just like we cooked in Russia. Thank you for this recipe, my American family was impressed.
Hi Marina, I would like to try this method. Do you only add the cooked condensed milk and butter? No cream or sour cream? And how much of each ingredient do you use? Thank you
Hi Marina, I am so glad to hear the cake turned out well! I like that you were able to adjust the recipe to your liking. Thank you for sharing, Happy thanksgiving!
I'm excited to find this recipe after discovering honey cake at a local Russian restaurant! QUESTION: Would you know how to adjust the cake batter recipe to incorporate pumpkin puree? I think this would be incredible to make for Thanksgiving!!! Thanks again!
Hi Jill, That is such a great idea!! I have not tried adding anything to this recipe, but you have absolutely peaked my interest! I would LOVE to know how this recipe turns out if you decide to try it!
My husband’s friend is bringing his girlfriend from Georgia over for thanksgiving. I wanted to make a dessert for her that will give her a taste of home. Will attempt this! Thank you!
How did it go?
It will be great Christy! She will love it! Good luck!
Hi Natalya,
Thanks a lot for the recipe! It was my favorite cake when I was a child. The friend of mine used to make the honey cake and I just was watching her how she magically made it. I thought then I might never be able to make it(for several reasons, one of them we didn’t have honey:))
I have one question as one of the tip says to storage layers in a plastic bag. Should I refrigerate it or no?
Thanks
Hi Olga, Yes, I recommend you store them in the fridge or if you want to store them for longer, You can even freeze them! Good luck and enjoy!
Hi Natalya,
Thank you for sharing this great recipe !
I just have one question, how do you keep the dough playable until the end, as mine got very hard to roll and I struggled to warm it up and soften it with my hands ?
Place a slightly dampened cloth over remaining dough while working on another piece to prevent dough from drying out and getting hard.
Hi Hermina- a quick hack would be to microwave the dough for a few seconds to warm it up, and when working on the dough try to keep it in a warmer place. If it's really cold in your home the dough will stiffen up faster.
This is a good recipe! Just a few tips- I add a bit more flour to the batter so that it rolls out easily. I also roll between two sheets of parchment paper with generous sprinkle of flour so it doesn't stick.
The cream is traditionally made from sour cream- I whip heavy cream, add a container of sour cream and plain condensed milk and a touch of sugar. Each cake layer should have a very generous portion of cream so it becomes moist!
Hi Dana- these are great tips, thank you for sharing! You sound like an expert with this cake 😀
Witch container of sour cream please, 8 oz?
One more question, would it be okay to whip the heavy cream on its own until a peak forms then just fold it into the cream cheese, butter, and dulce de Leche afterwards to prevent that over mixing issue you mention?
Ty in advance 🙂
Hi Elizabeth- Yes, that should work! Enjoy! 😀
I did it and it worked splendidly! However, the steam bath for 40min made the batter lose a lot of water and when I added the 3 cups of flour and thoroughly mixed it it was just a bunch of cake batter crumbles, so added about 1/4 cup of milk and it turned in to the consistency we were looking for.
The amount of cream was also too litttle and had to run to the store to back 1/3 of another batch to make it sufficient enough to cover the sides with frosting.
Hope this helps anyone else that ran into this issue. Thank you for the recipe 😊 i have to wait until Saturday to cut it for my nephew and I’m 100% we will love it because we couldn’t stop eating crumbs and frosting 😂 thank you
Hi Elizabeth- thank you for the feedback, it is appreciated. So the steam bath may need to be shortened to 30 minutes in that case. I'm glad that the cake turned out otherwise and you didn't have any issues with the cream separating.